One of the most useful tricks I have up my sleeve is what I call “glazing”. It’s something I learned to do when I was learning how to woodgrain—it’s one step in the process, adding depth and richness to a two dimensional painted finish. Over the years I have found that it’s also a good way to enhance or tweak a solid wood finish when a penetrating wood stain isn’t possible.

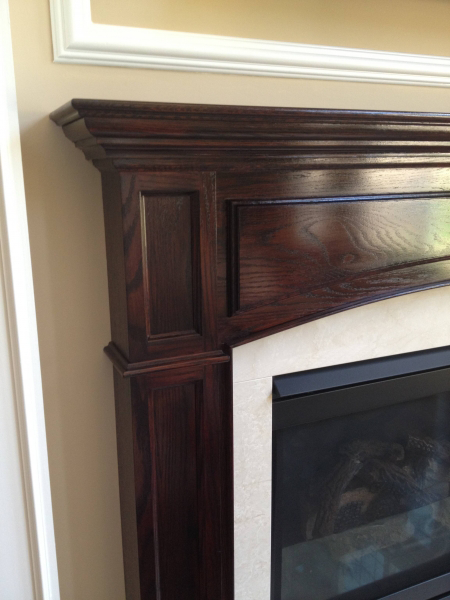
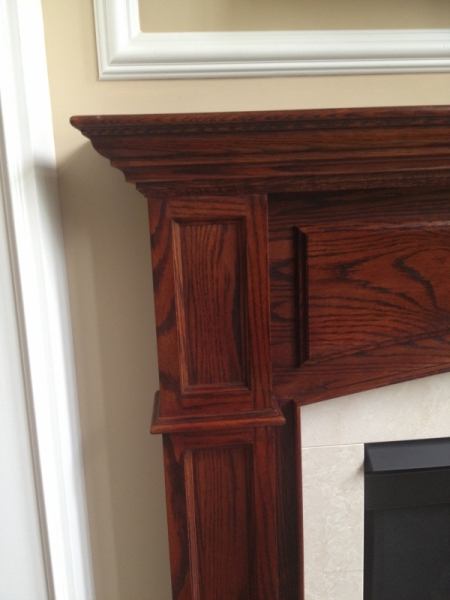
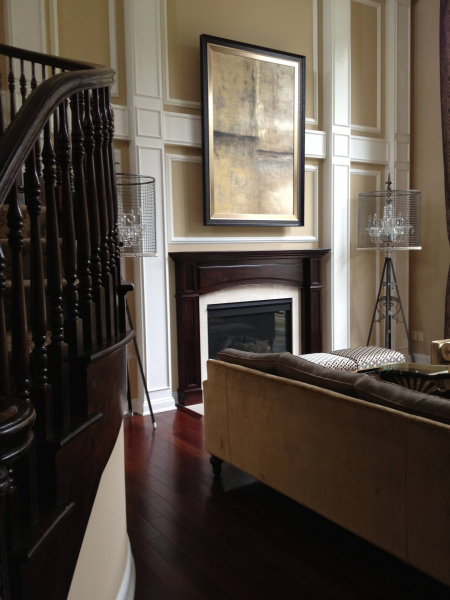
I would describe the process of glazing as being the application of a translucent medium with added tint in order to enhance an existing finish. An example of a good glazing project would be this oak mantle which had been stained and polyurethaned but the color was wrong and it didn’t work well with the adjacent staircase, the floor or anything else for that matter.

Before – original red oak stained finish

The usual fix for this would be to either a) strip off the existing finish, stain a deeper color and then polyurethane or b) apply a gel stain finish. Gel stain can be useful but it is dificult to apply and achieve a good result. It is also limited by way of color. This time, using my own glaze and a combination of artist oils, I was able to match the mantle to the staircase giving it a rich and more fitting look without having to destroy what was there in the first place.

After glaze applied
Refinished mantle blended in much better with staircase with no need for stripping
Another use for glaze is where a rich hardwood finish—such as mahogany or walnut—is desired but unattainable with stain when given a softwood base. The answer is to stain first and then enhance the finish with a tinted glaze in order to achieve the desired depth of color whilst preserving the character of the wood.
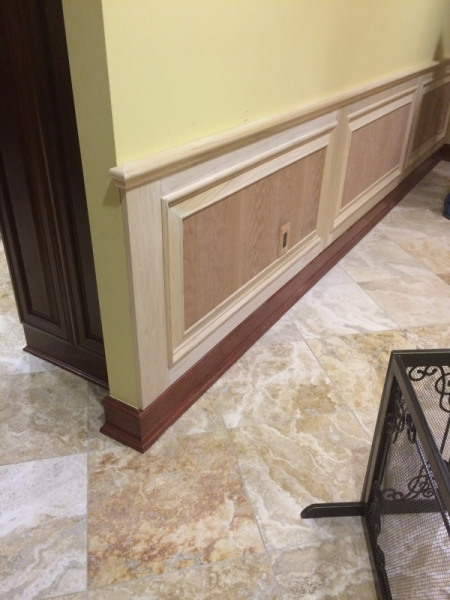
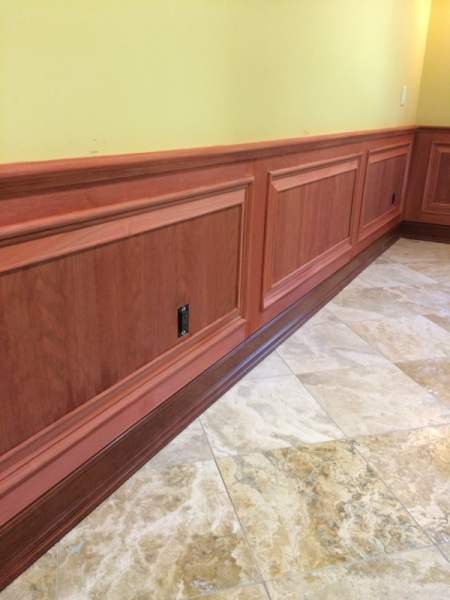
Here is a situation where I had to match a mixture of woods to a pre-finished baseboard.
Mixture of woods including pre-finished baseboard
The first step was to treat the new wood with a custom, unifying stain.
Custom stain applied to unify different types of wood
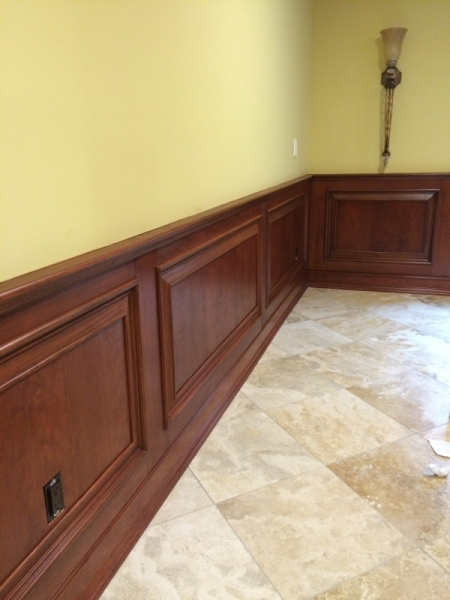
This was followed by a glaze then finished with a satin polyurethane for extra protection.
Glazed for depth and richness and polyurethaned for sheen and protection
Glazing is a particularly practical solution on a staircase. Stripping and sanding around posts, handrails and spindles would obviously be time consuming, difficult and expensive. Assuming it’s possible to get back to bare, stainable wood, it then would have to be stained, sealed and polyurethaned to protect the new finish. With glazing, all that is needed is a light sand before the color is added. The character of the wood is preserved because the glaze is translucent. Subsequent coats of polyurethane protect the glaze finish.
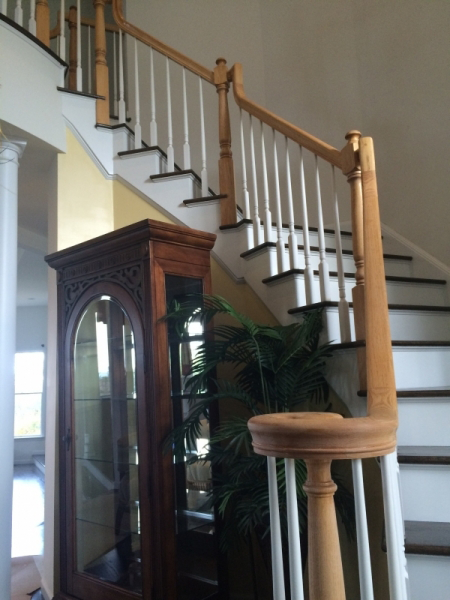
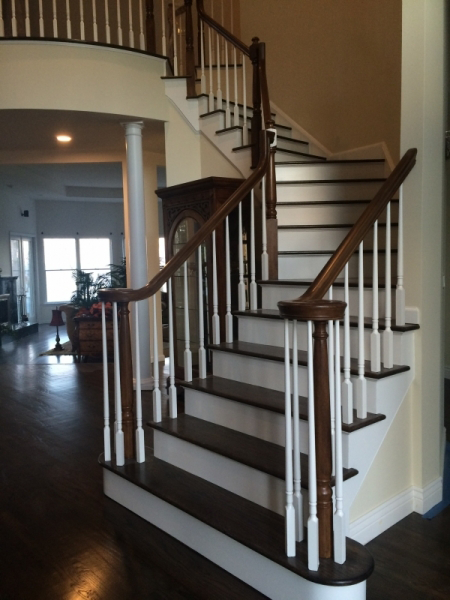
Here is an example where I matched a golden oak handrail to a walnut stained floor.
Before – golden oak posts and handrail
After – no need for stripping. Posts and handrail glazed to match refinished stairs and floor

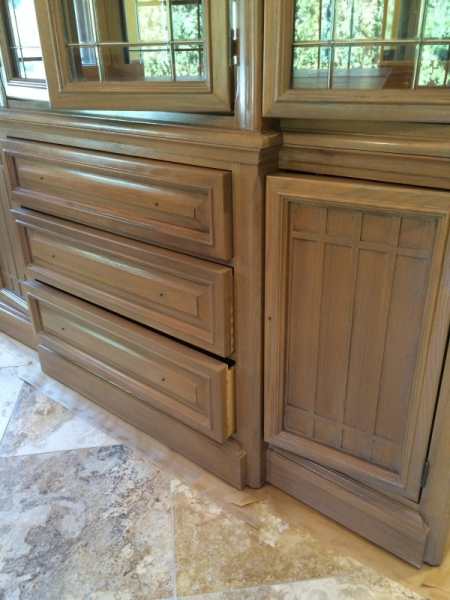
I also use a lighter glaze to produce a bleached finish. The following pictures are of a dining room set that was a golden oak finish but the customer was looking for something more contemporary to fit in with surrounding renovations.

Original golden oak finish to right of image

Sheen is determined by the selection of the polyurethane or final coat used to protect and enhance the finish.

One of the most useful tricks I have up my sleeve is what I call “glazing”. It’s something I learned to do when I was learning how to woodgrain—it’s one step in the process, adding depth and richness to a two dimensional painted finish. Over the years I have found that it’s also a good way to enhance or tweak a solid wood finish when a penetrating wood stain isn’t possible.

I would describe the process of glazing as being the application of a translucent medium with added tint in order to enhance an existing finish. An example of a good glazing project would be this oak mantle which had been stained and polyurethaned but the color was wrong and it didn’t work well with the adjacent staircase, the floor or anything else for that matter.

Before – original red oak stained finish

The usual fix for this would be to either a) strip off the existing finish, stain a deeper color and then polyurethane or b) apply a gel stain finish. Gel stain can be useful but it is dificult to apply and achieve a good result. It is also limited by way of color. This time, using my own glaze and a combination of artist oils, I was able to match the mantle to the staircase giving it a rich and more fitting look without having to destroy what was there in the first place.

After glaze applied
Refinished mantle blended in much better with staircase with no need for stripping
Another use for glaze is where a rich hardwood finish—such as mahogany or walnut—is desired but unattainable with stain when given a softwood base. The answer is to stain first and then enhance the finish with a tinted glaze in order to achieve the desired depth of color whilst preserving the character of the wood.
Here is a situation where I had to match a mixture of woods to a pre-finished baseboard.
Mixture of woods including pre-finished baseboard
The first step was to treat the new wood with a custom, unifying stain.
Custom stain applied to unify different types of wood
This was followed by a glaze then finished with a satin polyurethane for extra protection.
Glazed for depth and richness and polyurethaned for sheen and protection
Glazing is a particularly practical solution on a staircase. Stripping and sanding around posts, handrails and spindles would obviously be time consuming, difficult and expensive. Assuming it’s possible to get back to bare, stainable wood, it then would have to be stained, sealed and polyurethaned to protect the new finish. With glazing, all that is needed is a light sand before the color is added. The character of the wood is preserved because the glaze is translucent. Subsequent coats of polyurethane protect the glaze finish.
Here is an example where I matched a golden oak handrail to a walnut stained floor.
After – no need for stripping. Posts and handrail glazed to match refinished stairs and floor
Before – golden oak posts and handrail

I also use a lighter glaze to produce a bleached finish. The following pictures are of a dining room set that was a golden oak finish but the customer was looking for something more contemporary to fit in with surrounding renovations.

Original golden oak finish to right of image

Sheen is determined by the selection of the polyurethane or final coat used to protect and enhance the finish